
Post Arrival Guide: Settling into Groningen & Must-Do’s for International Students

All set to move to the Netherlands? Well, you must be wondering what the next steps are after arriving in Groningen. Worry not! I am here again to give you some tips on what to do after arriving.
I know how overwhelming the whole process of moving to a new country is, but taking it one step at a time really gives you a sense of direction and you get oriented to the city very smoothly.
Upon your arrival to the Netherlands, there are a few crucial tasks that require your attention. In this article, I will guide you through the essential steps you must take post-arrival so that you can pass through this phase of your Dutch journey seamlessly.
Hi! I am an Indian student here at the UG. All the tips I share with you today come from my personal experience when I moved to Groningen last year. I am sure you know about some of the things from this list, but I have also included some things that I didn’t know or was confused about. And I will try my best to make it as simply informative as I can since this is such an important topic to cover.
So essentially the first step is to settle in your new house and see what are the things you need to kickstart your new life. I needed a lot of things when I first arrived like bedsheets, quilts, utensils, and things like that to make me feel at home.
-
After settling in, the first step is to register at the municipality and get your BSN (your Social Security Number). You need to book your appointment within the first week of your arrival. You can also book an appointment before your arrival which is also very ideal, all you have to do is make the appointment online on the Gemeente’s website (the Municipality is called Gemeente).
-
Once you have your BSN, opening a Dutch bank account should be your next step, especially if you’re a Non-EU student, since you will only be able to claim your proof of funds in a Dutch bank account or in the source from where you transferred in the first place. It is also advised to open a Dutch bank account if you’re staying in the Netherlands for more than 6 months, as it becomes easier to manage your finances daily and many places only accept maestro cards. So, it is also advisable to bring cash with you to cover expenses for the first two months of your stay as it might take some time to have the bank account perfectly set up. We suggest checking out these banks where you can open an account.
-
You can start a DigiD account after receiving your BSN. After registering yourself on the app, you receive an OTP through a letter in the mail which finally starts the app. Your DigiD allows you to identify yourself when making online arrangements, such as with the government, educational institutes, or healthcare institutions. Your DigiD will enable you to log in anywhere quickly and securely. This also ensures that your data is always protected. [Source: IND]
-
The next thing you receive is your student card. You will receive an email from the university wherein you must upload a passport-size photograph of yourself that will be put on your student card. After uploading your picture and being fully registered at the university, you will be set to pick up your student card from the Academy building! For this also you will be required to make an appointment to go receive the card. You will also need to bring your ID/passport to this appointment.
-
If you’re someone who has received an MVV or multiple entry visa or are from Australia, Canada, Japan, Monaco, New Zealand, Vatican City, the United States, or South Korea, then next on your list is the Residence permit. Nothing special is needed from your end for this step, as you’ve already provided your information to the IND for your visa. It takes some time for them to have all the residence permits ready. As soon as they are ready and received by the ISD, you will receive an email from the university asking you to book a slot to collect your residence permit. There are 2 places where you can pick up your permit, either at the Academy Building of RUG or at the IND desk in Zwolle. You will also need to bring your passport as a mode of identification!
-
Another very important thing is getting health insurance and registering with a GP. Now, there are a few different options for health insurance, but the most common one is the AON Student Health insurance (I have the same), as it's meant for students, is a lot more affordable, and still covers a lot of things. You can go check it out, and see what works best for you! After getting your health insurance, register under a General Practitioner aka GP (in Dutch: huisarts), as you need to be registered under a specific doctor, and only meet with them in the time of illness and such.
-
As an international student in the Netherlands, you’re sometimes required to undergo a TB test. It depends on which nationality you are. You are most likely notified through letters in the mail sent by the IND or the GGD. Many countries are exempted from this obligation. If you’re not exempted from this, you must get tested every 6 or so months. This test is free and is done at the GGD in Groningen.
-
Now that your bank account is set up, you can claim proof of funds back (Non-EU students only). The university requires you to have a Dutch bank account to transfer the funds back to you. All you have to do is fill out the form provided by the university and send it along with a bank statement from your new bank account.
Apart from these formalities, you also need to find a bike to travel through the city like a true Dutchie. You can find many bike shops around the city, and a popular choice for many is a second-hand bike, to cut costs. There are also options for renting a bike at some stores!
Another way of transportation is buses/trains for which you can get an OV Chipkaart. This is a travel card that you can top up and tap on buses/trains. There are two types of OV chipkaart that you can get issued: Anonymous or Personal. Anonymous OV Chipkaart is blue, while the Personal one is yellow and has your details on the back. Note: You can only get a personal chipkaart if you have a Dutch bank account. You can find good deals like a 40% discount on every bus/train trip you make outside of peak hours!
As you begin your exciting journey as an international student at RUG, the post-arrival phase is critical to ensuring a smooth transition. I hope these tips prove fruitful to your experience and I wish you all the best for your new life here in Groningen. Don’t forget to immerse yourself in Dutch culture, and make lifelong friends and memories! Thank you for reading through and let us know below if you have any questions or suggestions.
All the best with your preparations :)
About the author
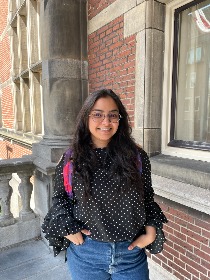
Hey there! I am Khushboo, and I come from Delhi, India. I am currently studying MA Media Creation and Innovation here at the UG. I love watching thriller movies and comedy shows, making digital art, and taking pictures in my free time.